mdrafiepatwary@gmail.com
Posts by :

Potato Pest Management
Insect name: Potato borer
Introduction: Stinging insects damage plants by cutting their roots. The eggs hatch and the caterpillars eat the outer (skin) part of the leaf.
How to identify the insect: The stinger is quite strong, 40-50 mm long The back of the insect is dark brown, the flanks are streaked with black and the colour is greyish green. The body is soft and oily.
Examples of damage: Cutworms cut saplings and bore into potatoes causing light crop damage. The insect hides underground during the day. Cut potato plants are often found lying next to the cut root.
Management: If the infestation of cutworms is not too high, the cut potato plants should be looked at and the soil around them should be turned over to find and kill the cutworms. While irrigating the potato field, kerosene oil mixed with water at the rate of 20 ml/cent can kill the cuttlefish hiding in the soil. In addition, to encourage the birds, it is necessary to bury bamboo sticks or twigs in the field. Insecticides should be used if the infestation is heavy. Mix 5 ml of chlorpyrifos (Darshan) at 20 EC rate with every litre of water and soak the roots and soil regularly. Separ should be done after 30-40 days of planting potatoes.
Insect Name: Potato Jab Bug
Introduction: Myzas persici among the beetle species destroys seed quality by spreading virus diseases.
Pattern of damage: This species helps spread potato leafroll virus A and virus Y causing severe damage to potato crops.
Favourable environment: The number of this insect increases from the middle of December.
Administration: Dymacron/Benicron 100 SCW 10 ml. The drug should be mixed with 10 litres of water and 5 percent of the soil should be applied well.
Name of the insect: Potato twine bug
Introduction: Potato twine moths are small, brown with fringed, narrow wings.
Identification: Adult worms are whitish or light pink in colour and 15-20 mm long.
Pattern of damage: The caterpillar damages the potato by tunnelling long distances into the potato.
Favourable environment: Potatoes stored at home in Bangladesh are affected by this pest.
Management: House-stored potatoes should be covered with a thin layer (0.5 cm above the potato) of dry sand, ash, chaff, or sawdust. Before storing the potatoes, the cotton worm infected potatoes should be selected and discarded.
Name of the insect: Udchunga
Introduction: It is a pest of potato crops.
Pattern of damage: They emerge from burrows at night and eat roots, potatoes and stems of potato plants.
Management: Use poisoned baits. Insects should be removed from the hole and killed.
Disease management:
Disease Name: Potato blight/Nabi blight
Introduction: This disease is caused by the attack of the fungus called Phytophthora infestans.
Pattern of damage: First, leaves, tips, and some parts of the stem are surrounded. If the relative humidity of the air is high, most of the crops of the land are affected within 2-3 days. In the morning, white powdery fungus can be seen under the affected leaves. Infected fields have a burning smell and appear as if the crops have been burnt.
Management: Disease free seeds should be used. Irrigation should be stopped as far as possible in the affected land. As soon as the disease appears, approved fungicides such as Ridomil (0.2%), Dithane M-45 (0.2%) etc. should be applied after 10-12 days.
Disease name: potato blight or leaf spot
Introduction: This disease is caused by the fungus called Alternaria solani.
Damage pattern: Small brownish angular spots on lower leaves. The affected area develops dark circular spots alternating with slight brown areas. Leaf spots and stem spots are relatively j¤^v type. Symptoms of this disease include yellowing of trees, falling leaves and premature death of trees. Infected tubers develop dark brown to black spots.
Management: Ensure balanced fertilisation and timely irrigation. As soon as the disease appears, 2 grams of rovral should be mixed in every litre of water and applied after 7-10 days. Dithane M-45 can be applied at the rate of 0.2%. Early varieties of potatoes should be cultivated.
Disease name: Verticillium wilt
Introduction: A type of fungus is the source of disease.
Damage pattern: Verticillium elboetrum is the source of the disease. Diseased plants dry up, turn yellow and die prematurely. When the affected stem is cut, grey colour is seen inside. On the surface of the tuber, the eyes turn pink and grey.
Management: Use of disease free seeds, soil treatment, crop stage.
Disease Name: Potato stem canker scarf disease
Introduction: This disease is caused by the fungus called Rhizoctonia solani.
Damage Patterns: Attack spots appear on growing shoot heads and stolons. Reddish spots or lesions are formed at the base of large plants. Small tubers are seen along the stem. Infected tubers show solid black and dormant disease spores.
Management: Terchlor (PCNB) at the rate of 15 kg per hectare should be applied in the seed canal before sowing. Seed treatment with 3% boric acid or application of separ machine also gives good results. Avoid planting seed potatoes too deep in the soil. Well germinated seed potatoes should be planted.
Disease Name: Stem Rot
Introduction: This disease is caused by the attack of the fungus called Sclerosium Rolfsi.
Pattern of damage: Attack of this disease causes brown spots covering the base of the stem. The tree droops and the leaves turn yellow especially the lower leaves. A whitish web of fungus is seen on the affected area or in the surrounding soil. After a few days, a mustard seed-like sclerotium is formed. Potatoes ooze water and rot. Gradually the potatoes rot.
Management: Affected plants should be removed along with some soil. The land should be cultivated deeply. Organic fertilizers should always be applied to the land.
Disease Name: Dry Rot Disease of Potato
Introduction: This disease is caused by fungal attack.
Pattern of damage: Some deep black spots on the potato. Holes are formed inside the potato. Although the initial decomposition is wet, it dries and hardens. Infected areas show rounded folds and sometimes cloudy white fungal reticulation.
Management: Potatoes should be well sorted and stored. Potatoes should be stored after proper curing. Seed potatoes should be treated with Dithane M45 solution (0.2%). Sacks, baskets and stored potatoes should be treated with 5% formalin. Potatoes need to be treated with Tekto 2% powder at 2 grams per kg.
Disease name: Drooping and brown rot
Introduction: This disease is caused by the fungus called Pseudomonas solanacearum.
Pattern of damage: A branch or a part of the tree may fall. Leaves usually do not turn yellow and fall off when green. If you look at the stem of the tree at the beginning, you can see the brown affected area. Fallen trees are silenced very quickly. Cut the affected potato and you will see brown spots inside. White pus appears in the eyes of the potato and the potato rots within a few days.
Management: Healthy disease free seeds should be used. At the time of potato planting, stable bleaching powder should be applied at the rate of 80-90 kg per hectare. Apply irrigation in moderation and stop irrigation if disease occurs.
Disease Name: Potato Blight
Introduction: This disease is caused by the fungus called Streptomyces scabies.
Pattern of damage: Mild scab causes raised and raised brown spots on the tuber. Deep ringworm causes round pits or pits. Disease attack is usually limited to the skin.
Management: Disease free seeds should be used. Excessive use of nitrogen fertilisers in the land should be avoided. The seeds should be treated with 3% boric acid. 120 kg of gypsum fertiliser should be applied per hectare.
Disease Name: Potato Black Leg/Soft Rot Disease
Introduction: This disease is caused by the attack of Aruna carotivora bacteria.
Pattern of Damage: Cells rot in the affected area. Rotten potatoes produce a strong odour. When pressed, a kind of contaminated water comes out of the potato. The affected part is brown and soft which can be easily distinguished from the healthy part.
Management: Healthy and disease free seeds should be used. Do not over-irrigate. Cultivation should be done early to avoid high heat. Potatoes should be well sorted and stored. Seed potatoes should be preserved by cleaning the tubers with 1% bleaching powder or 3% boric acid solution.
Disease name: Leaf roll virus
Introduction: It is a viral disease.
Pattern of damage: Leaves of affected plants become shrivelled, erect and curled upwards. Agar leaves turn light green and plant growth stops. Sometimes the edges of the affected leaves are reddish purple in colour. The tree is short and stands upright. The number of potatoes decreases and the potatoes are much smaller.
Management: Disease free seeds should be used. Pesticides (Azdrin, Novacron, Menodrin etc.) should be mixed with 2 ml or 1 ml Diamicron per litre of water and spread on the ground every 7-10 days. Infected plants should be removed along with tubers.
Disease Name: Mild Mosaic
Introduction: The disease is caused by Potato virus A and X.
Pattern of damage: Leaves turn yellow with various coloured spots. The leaves are slightly curled and the tree is stunted.
Management: Use of disease-free seed potatoes and sowing of potato resistant to this disease and control of borer.
Disease Name: Common Scab
Introduction: Streptomyces scabies
Pattern of damage: Only tubers show symptoms. Brown, raised or crusty spots (ringworm) appear on the tuber.
Management : The remedies for this disease are – crop stage, use of treated and disease free seeds, avoidance of potato cultivation in alkaline soil and field and regular and moderate irrigation.
Disease Name: Internal black spot
Introduction: Diseases caused by protozoa
Damage pattern: The centre of the tuber is black or bluish-black in colour. If the lack of oxygen is too much, all the tubers may turn black. The affected area may contract and swell.
Management: Remedies for this disease include not storing at high temperatures and keeping the warehouse well ventilated.
Disease Name: Heart Hollow Disease
Introduction: Parabiotic Diseases
Pattern of damage: Usually large potatoes have uneven hollows in the centre. The side cells are rough and brown in colour which is not visible from the outside.
Management: The remedy for this disease is short distance sowing, use of balanced fertilisers and regular irrigation.
Harvesting:
It is not advisable to pick potatoes on cloudy or rainy days. Picking up potatoes in the morning
NEVER MISS A POST!
FREE MONTHLY SUBSCRIPTION
Cucumber Cultivation At a Glance
One of the popular vegetables. Cucumber is mainly eaten as a salad and vegetable. Cucumber contains 96% water content per 100g of edible portion, 0.6g of fat, 2.6g of protein, 18mg of calcium, 0.2mg of iron, 40mg of carotene, 10mg of dietary C.
We need good seeds and fertile soil along with sand to grow cucumber
Improved varieties
Dadi 2231 F-1, Titumir F-1, Green King, Sheela, Barmasi, Destiny, Bulbul F-1 etc. are suitable for year-round cultivation except severe winters.
Sowing time
February-March (Mid Magh-Mid Phalgun) suitable time depending on the variety.
Cultivation method
4-6 plowings and ladders should be given depending on the type of soil. The first ploughing needs to be deep. Cultivate bed and furrow method. It makes irrigation and drainage convenient, maintenance is easy and the wastage of irrigation water is reduced. Fertiliser should be applied at the time of final cultivation. Direct sowing should be done at a distance of 60 inches from the line and 60 inches from the seedling.
Seed quantity: 1.5-4 grams per cent depending on the variety.
Below is how I use fertiliser
Manure management, Fertilizer name, Fertilizer per hectare, Fertilizer per cent, Rotten dung 5000 kg dung, 100 kg TSP, 50 kg MOP, 50 kg Gypsum, 12 kg Zinc, 10 kg Boron Apply to the soil during land preparation. Apply remaining dung (5000 kg), TSP (100 kg), Urea (80 kg), Potash (50 kg) on soil 5-6 days before transplanting. Apply 40 kg of urea 1st time after 10-15 days of planting, 2nd time after flowering and fruiting. The type of soil should increase the amount of fertiliser. Before planting the seedlings in the soil, after applying the fertiliser, the soil should be soaked well with water. After that, after 7-10 days, the seedlings should be planted.
Irrigation
Give irrigation within 7-10 days after sowing if the soil sap is low. Generally irrigate 2-3 times after 2 weeks. If there is a lack of sap in the land, irrigation should be done. Irrigate before the sap level in the soil drops below 50% (full-grown roots 50 cm) throughout the life cycle.
Weeds
Weed control is done by ploughing and weeding well with a ladder, using pure seeds and using clean agricultural machinery. After irrigation and fertilising, control the weeds as soon as they appear. Weeds should be controlled after 20-25 days of seedling growth. If the tree is too thick, it should be thinned. It is better to keep 50-60 seedlings in rabi season and 40-50 in kharif season per square metre.
Weather and Disasters: Have gutters to drain excess rainwater. Keep excess rain water out of the land.
Insects
Cucumber leaf tunneler, red pumpkin beetle, fruit fly and tobacco caterpillars should be sprayed with cypermethrin (such as Ustad 20 ml or Magic or Kot 10 ml) per 10 litres of water and sprayed 2/3 times every 5th century after 10-12 days. . Care must be taken when spraying the medicine.
In order to control cucumber whitefly and weevil, Imidacloprid insecticide (like Edmyr or Tido 7-10 ml / 2 mouths) should be mixed with 10 litres of water and sprayed 2/3 times every 5th century every 10 days.
Disease
Cucumber Powdery Mildew Disease Control Sulphur fungicide (eg Cumulus 40gm or Geivet or Monovit 20gm) or Carbendazim fungicide (eg Goldazim 5ml or Mcozim or QB or Companion 20gm) mixed with every 10 litres of water for 10 consecutive days. A total of 2-3 times should be applied from the beginning.
Spray Mancozeb or Mancozeb + Metalaxyl (eg Ridomil Gold 20g per 10 litres of water) 3 times at 7-10 days to control target spot and gummy stem blight of cucumber. Care must be taken when spraying the medicine.
In the control of cucumber mosaic disease, if whiteflies, jab beetles are seen on the ground (carrier insects), insecticides of the imidacloprid group (such as Edmire or Tido 10 ml. 2 mouths) should be mixed with 10 litres of water and sprayed every 5 centuries. If you sprinkle ash on the tree in the morning, this insect will fall from the tree
Caution
Before using pesticide/insecticide, read the label on the bottle or packet carefully and follow the directions. Wear safety clothing during use. Do not smoke or drink during use. Be careful not to let water from pesticide-sprayed land run into open water bodies. Market the crops of pesticide applied fields at least seven to 15 days later.
Yield: 100-300 kg yield per century depending on the variety.
NEVER MISS A POST!
FREE MONTHLY SUBSCRIPTION
Easy way tomato cultivation
Benefits of Tomato
Tomato is a tasty and nutritious vegetable. Tomatoes are a winter vegetable but are now available all year round. Tomatoes can be eaten raw or ripe. It is rich in vitamins A, C, K, folate and potassium. Tomatoes also provide thiamin, niacin, vitamin B6, magnesium, phosphorus and copper. Apart from this, one cup of tomato contains about two grams of fiber. There is a lot of water in it.
Tomato is a vegetable or fruit that is easily Tomatoes can be cultivated at home.
Cultivating tomato seeds
First we need to cultivate good quality tomato seeds.To cultivate good quality seeds we need to cultivate tomato seeds according to our season.
There are different types of tomato varieties among which the improved varieties are called
Advanced Varieties
Bahar, Bina Tomato – 2, Bina Tomato – 3 etc. Summer, Bina Tomato – 8, Bina Tomato – 9, Bina Tomato – 10, Bari Tomato – 1, Bari Tomato – 2, Bari Tomato – 3 etc. Winter and Bina Tomato – 7, Bari tomato – 4, Bari tomato – 5 etc. All year round cultivation is better. Sowing seeds are more suitable for year-round cultivation. At any time of the year, tomato seeds become seedlings, just as seedlings become true plants, and even flowers come from those plants. But not all varieties bear fruit. Therefore, year round cultivars such as Bari Tomato 6 (Chaiti) can be cultivated such as Bahar, Roma VF, Raja, Suraksha etc.
Tomato Plant Propagation
When you find a good quality tomato in your home, you can plant it from seed.
Seed and seedling soil treatment
Tomato is cultivated by producing seedlings. For this, seeds should be sown in seedbeds and seedlings should be made there. For success in tomato cultivation, the seeds bought from the market or the seeds kept at home must be cleaned first. If possible, a germination test should also be done before sowing in the seed bed. Once planted, if those seeds do not grow or grow less in the seedbed or if the grown seedlings are diseased, it will cause damage. Pathogens are often hidden in seeds. Diseases such as early blight, mosaic virus, fungal downy mildew etc. can be present in seeds. Those pathogens become active when they get water after being soiled. As a result, the plant dies. Sometimes the soil of the seed bed may also contain some pathogens. such as seedling collapse or damping off of disease pathogens. These pathogens can also attack seedlings. That is why it is better to clean the soil of the seed bed. Seeds can be cleaned in several ways. Seeds are easy to clean by soaking them in hot water. Soaking tomato seeds in hot water at 500 degrees Celsius for 30 minutes kills the bacteria and fungi that are stuck on or inside the seeds. After that the wet seeds should be picked and dried in the shade and sown. The seeds can also be treated with the juice of some plants. This can be done with garlic juice. Besides, the seeds can also be treated with fungicides. And if the soil of seed bed is tilled and organic manure is mixed with it and covered with polythene for two weeks, many germs in the soil will die in the heat of the sun and the soil of seed bed will be purified. If you don’t have time, spread wood powder 3 inches thick on top of the soil of the seed bed and set it on fire.
Tomato seedling production
Tomato can be cultivated by sowing tomato seeds directly in the ground. But to get good yield quickly, tomato seedlings should be made separately and planted in the main land. For this, the soil should be cleaned and cultivated well in a sunny high place and the seed bed should be made. After cultivation, the soil should be leveled and beds should be made 1 meter wide. It is better to make the bed not too long, 3-5 meters. It benefits the care. The seeds can be sown in seed beds by sprinkling. For sprinkling
Generally: 100-150 grams of seed per square meter of seed bed. It takes 6-14 days for seedlings to grow from seed. For winter tomato cultivation, seeds should be sown in October-December. For early cultivation, seeds should be sown in July-September.
When To Lift Tomato Seedlings
Usually when they are 8-10″, care must be taken to lift them. Loosen the soil first, so as not to break the roots. Carefully pull the seedling along with the roots. After lifting, quickly plant the roots in new soil.
How to transplant tomato plants
Before transplanting tomato plants, prepare the soil well. It should be ensured that the roots are not damaged while lifting the seedlings. Then plant the seedling in a new location where it gets enough sunlight. After transplanting the plant should be watered sufficiently and kept in shade for a few days so that the roots can establish well in the soil. With extra care the tree will grow faster.
Land preparation
The land should be plowed 4-5 times and the soil should be loosened with a ladder. 20-25 cm high and 230 cm wide beds should be made for tomato cultivation in summer. 30 cm drain should be kept between 2 beds to facilitate irrigation. 25-30 days old seedlings should be planted in each bed at a distance of 60×40 cm in 2 rows.
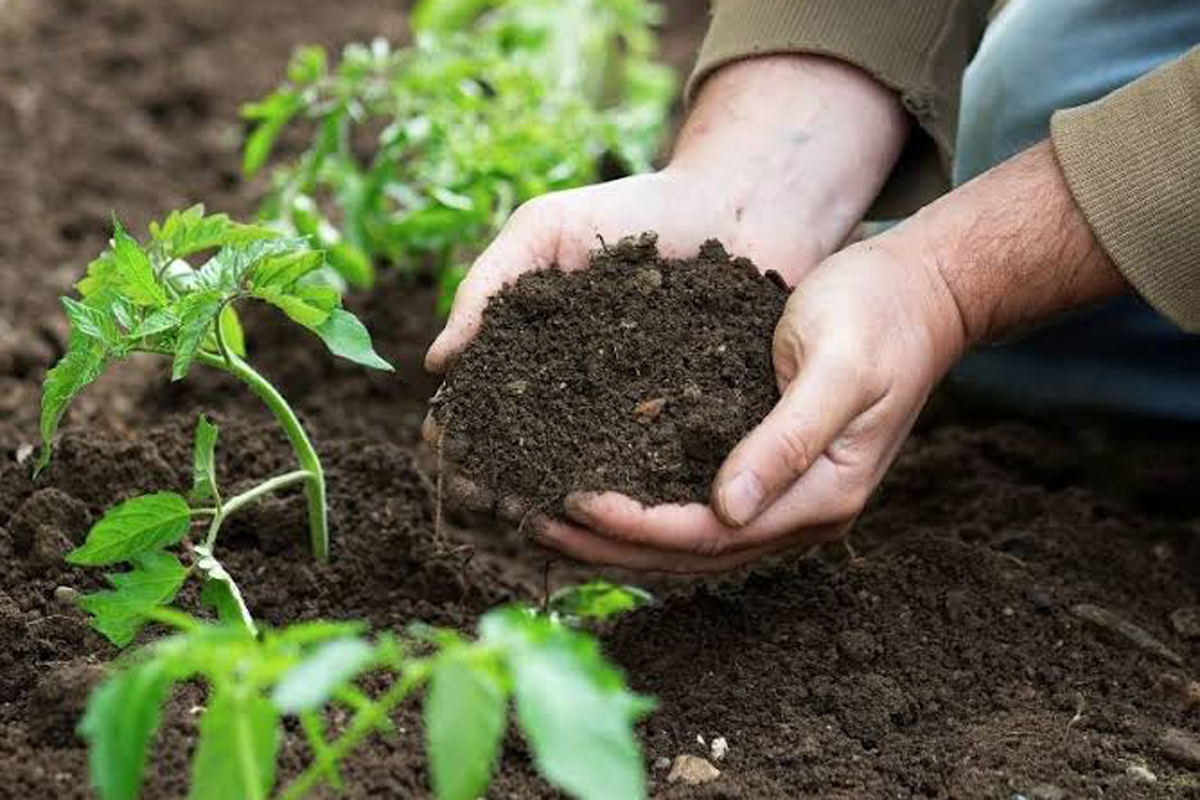
Moreover, if you want to grow tomato plants on your roof or balcony, then why should you prepare the soil well, because your plants can grow well, so your plants will get good strength, if there is no soil around you, then the soil Available to buy, try to get a big top
Planting distance
25-30 days old seedlings should be planted in 2 rows in each bed at a distance of 60×40 cm. Planting time For winter tomatoes, seedlings can be planted from mid Kartik to 1st week of Magh (November to mid January). But for early cultivation the planting time should be brought forward. Planting should be done in September-October for early cultivation and February-March for Nabi cultivation and April-May for summer cultivation.
How to plant tomato seedlings in containers?
You can follow the rules above
Amount of Fertilizer in Tomato Plant
The following fertilizers are applied per hectare for tomato production. But it is better to test the soil and recommend fertilizer.
Fertilizer Name
Fertilizer quantity (kg/cent)
Fertilizer quantity (kg/ha)
Urea 2.0-2.4, 400-500
TSP 1.20-2.0, 500-700
MOP 0.8-1.2, 200-300
Dung 30-45, 8-12 tons
Fertilizer application management
Rotten cow dung/compost 40 kg, urea 1.20 kg, TSP 700 gm, MOP/potash 970 gm should be applied per century. Samudaya Gobar, TSP and 300 grams of potash fertilizer should be applied to the soil at the time of last tillage before land preparation. After 10 days of planting 400 grams of urea for the first time, 25 days for the second time and 40 days for the third time respectively 400 grams of urea and 280 and 240 potash fertilizers should be applied. Here in our rules, you may have to pay more or less, you may have more or less fertility in your area, so you have to follow our rules.
Interim Care
We are talking about very short maintenance here, ‘A’ shaped bamboo stakes or some stakes with dead leaves trimming are very good for your tomato plants because when your plants get tall, they have the smell of the plant, so as soon as you need the plants that are needed. It is a task to remove the weak part. Apart from this, irrigation can also be done if necessary. In case of virus disease, the plant should be removed or the tomato plant should be cut. Appropriate measures should be taken to treat other diseases. Similarly, even if insects appear, proper measures should be taken. What diseases or insects can be attacked at any stage of tomato plant growth can be seen from the following list.

Pests of tomato plants
For control of tomato tip and fruit borer and leaf-wrapping insects, thiamethoxam + clothyraniliprol insecticide (eg Volume Flexi 5 ml or 1 mouth) or Cypermethrin insecticide (eg Ustad 20 ml 4 mouths or Magic or Cut 10 ml 2 mouths) mixed with every 10 liters of water every 5 Spray 2/3 times every 10-12 days. Care must be taken when spraying the medicine.
For the control of suckers/hepars/beetles, black flies and whiteflies, Imidachloroprid insecticides (like Edmyr or Tido 7-10 ml / 2 mouths) or carbaryl insecticides (like Sevin 20 grams) should be mixed with 10 liters of water and sprayed every 5th century for 10 days 2/ 3 times. The medicine should be sprayed on the underside of the leaves where the insects are.
For the control of tomato weevils, Cartap insecticide (Care 50 SP or Suntap 50 SP 20 ml / 4 persons) or Lambda-cyhalothrin (Karate 2.5 EC or Fighter Plus 2.5 EC 15 ml / 3 persons) every 10 liters for 5 centuries Spray 2/3 times every 10 days.
Diseases of tomato plants
Mancozeb fungicides such as (Ridomil Gold 20gm) or Carbandism fungicides such as (Mcozym 50; or Goldazim 500 EC 10ml/2 mouth) mixed with 10 liters of water for 7 days 3 times in a row for the control of tomato wilt, early blight and bud blight. Spray at the base and soil # If the attack is severe, mix 2 grams of rovral per liter of water and spray from the beginning. Care should be taken while spraying the medicine.
Bushy stunt (spread by an insect called leaf hopper) should be removed and burned.
In the control of mosaic disease and leaf curling disease, if jab beetle (carrier insect) is found in the land, insecticides of imidachloroprid group (such as Edmair or Tido 10 ml. 2 mouths) should be mixed with 10 liters of water and sprayed every 5 centuries. If you sprinkle ash on the tree in the morning, this insect will fall from the tree. Care should be taken when spraying the medicine.
When to take out tomatoes or can preserve?
Harvesting Tomatoes
Harvest time is within 2-4 months depending on the time of germination and planting. Tomatoes can be picked both ripe and unripe. However, ripe tomatoes should not be picked for shipping, and artificial hormones should not be used to ripen or improve the color of tomatoes. If you plant on your moon or balcony you can grow as you like.
If you have any suggestions you can email us Thanks for reading the blog

Dragon fruit cultivation at a glance
This pink and white fruit with soft skin and sweet smell is very delicious to eat. This fruit is rich in vitamin C, mineral nutrients and is an excellent source of fiber. Many people avoid it because it is more expensive than other fruits. But did you know that you can start cultivating it on […]
Garlic cultivation at a glance
Benefits of Garlic Garlic is an important ingredient used in everyday food. Garlic is used to add flavor to all types of curries. Many people also like to eat pickled garlic.This garlic has many nutrients. Rich in medicinal properties, this ingredient was used as medicine in ancient times. Garlic is considered a superfood because of […]